E-commerce - Storefront 2.0
Storefront 2.0 is the responsive desktop and mobile redesign of the original Platt Electric Supply website.
Storefront mockups, Sketch
At Platt Electric Supply (parent company: Rexel USA), several wireframes and interactive prototypes were developed across a suite of electrical supply E-commerce B2B sales and marketing tools. Below is a description of the process of how the team of UX Designers developed the new branding of the Platt Electric Supply Storefront website, Storefront 2.0. Storefront is a mobile responsive multiple banner e-commerce site in which the user can toggle between Platt, Rexel, and Gexpro views. This project was created collaboratively with Product Owners, Software Engineers, Front End Developers, and UX Designers through delivering ideas to cross-functional teams in an agile and scrum environment.
STEP 1
User-centric analysis of Requirements
Daily standups were conducted daily to provide insight on specific needs of the product development process. Product Owners assigned specific tasks through Visual Studios, a development environment. User research was not defined, therefore analyzation must be conducted. The provided requirements were examined from a users perspective. Personas, which included Rexel USA, Gexpro, and Platt customers were studied to ensure the requirements were analyzed from the correct angle. A typical persona would describe a person who works as an electrician and needs to create work orders and buy multiple tools and supplies, whom are returning customers. After approaching the requirements through different use cases, a list of questions and concerns would be compiled for the Product Owners, Software Developers, or both for feedback. The importance of catching problems early on was imperative for successful development. After clarification and analysis, the changes were sent back to the Product Owner for approval.
STEP 2
Low Fidelity Mockups
Checkout process
After the requirements were completed and approved, I began to work on the low-fidelity mockups. I primarily used Balsamiq for designing these first initial mockups, while occasionally using other software such as Sketch and InDesign. In grayscale, I drew up the large (desktop) version and small (mobile) versions of the design requirement. I called out all micro-interactions and scenarios (see yellow boxes) for the developers to read and understand. As part of the process, I made sure to be as detail oriented as possible in order to fully communicate the purpose of the pages. Then, I passed the low fidelity mockups back to the Software Developers and Product owners, where they informed me whether or not this design would work with the data.
STEP 3
High Fidelity Mockups


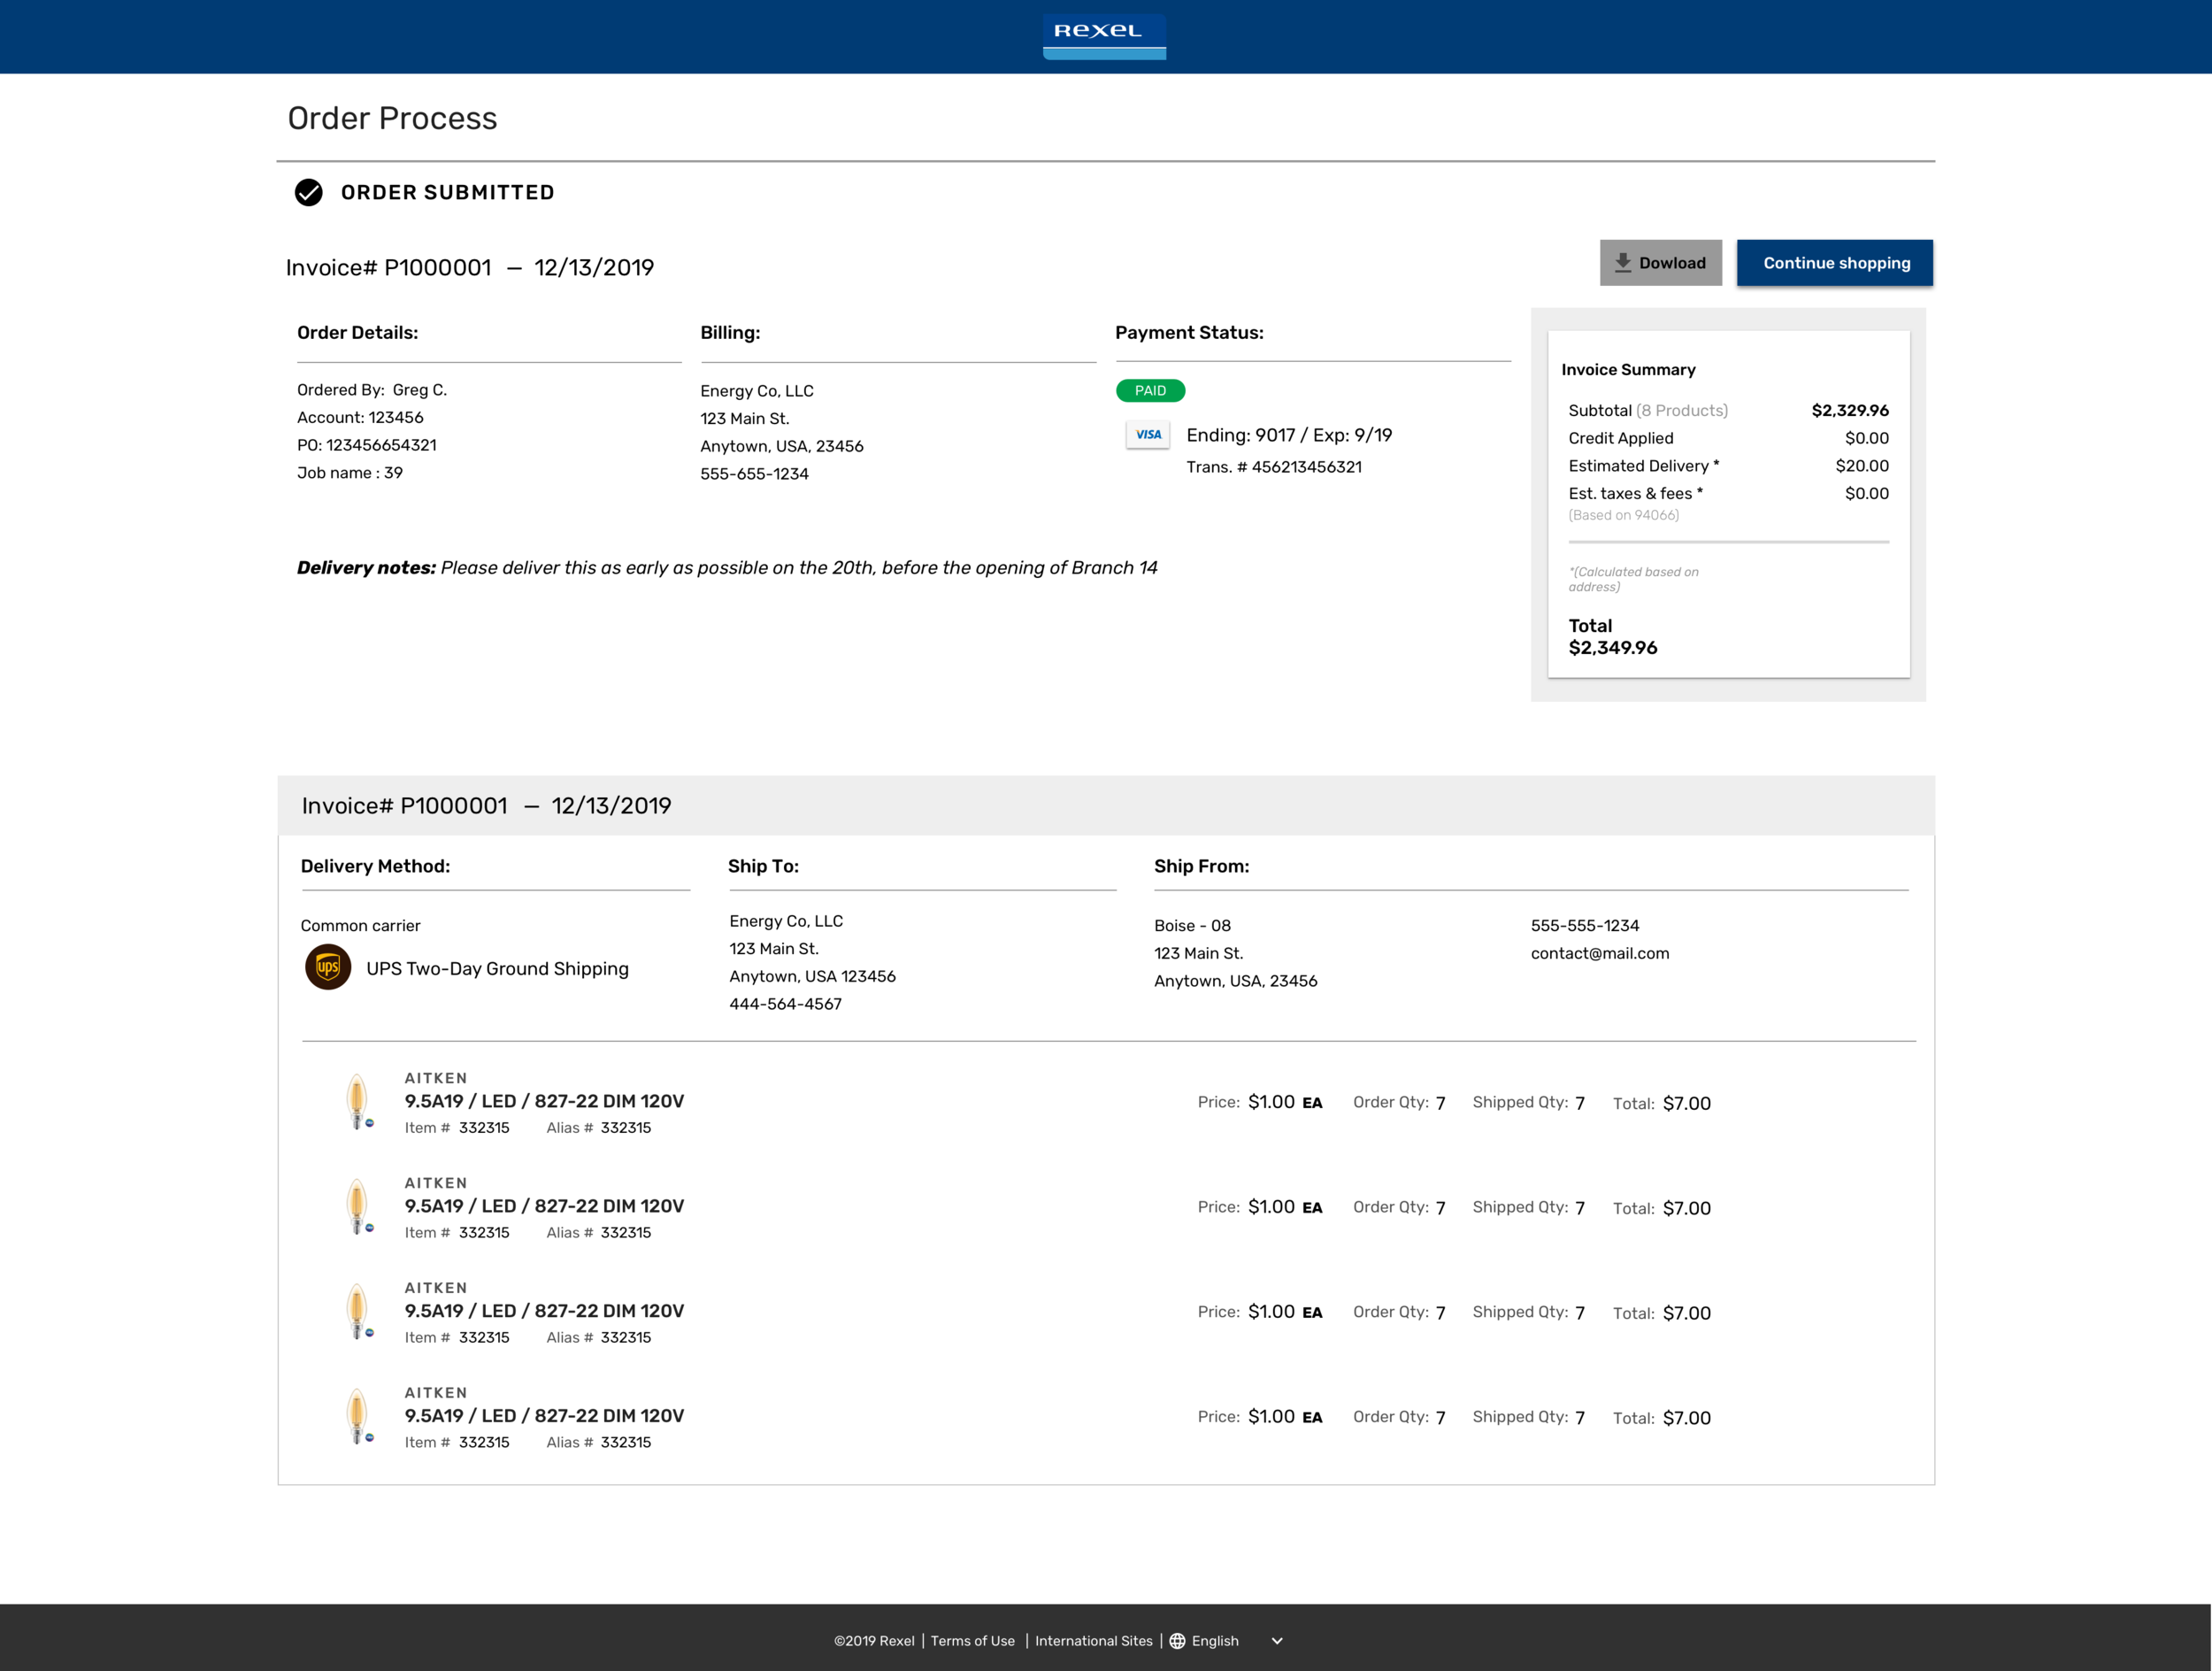
High-fidelity mockups for the Storefront Check out process for when a user is ready to submit an order for checkout
When the low-fidelity mockups are approved, the next step was to create high-fidelity mockups. I used Sketch to design the mockups and added interactions on the pages. For every high fidelity mockup, I created a desktop and mobile version. Using version control software, such as Plant, I kept track of all versions of the work. In Sketch, I added interaction hotspots and pushed them to InVision. This way, the developers were able to walk through the clickable prototypes for a better understanding. Sometimes, I had to defend my design decisions if the developers were not understanding of the choices.
STEP 4
Ready for development! The developers then used the mockups as a reference, following all the design decisions to develop the product. Please check out the launched Storefront 2.0 website.


